
Our house numbers have always been difficult to see from the road, especially at night. So I thought it would be fun to paint large numbers on the front steps for cute curb appeal and increased visibility!
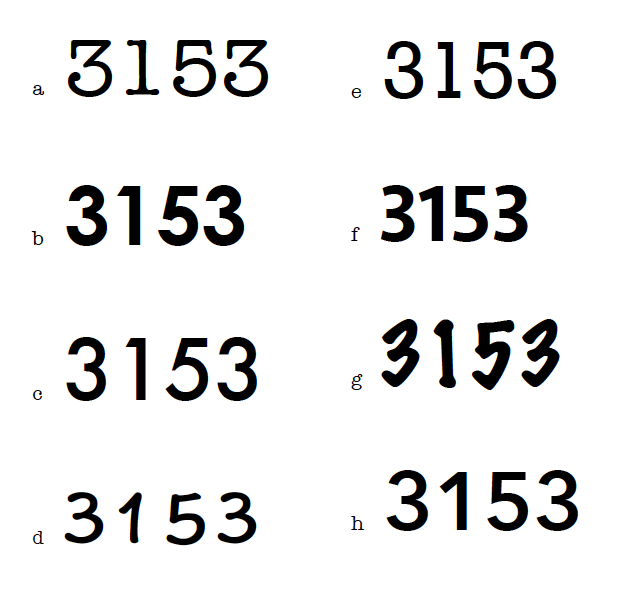
The first task I had to take on was picking a font! I jumped onto Microsoft Word, typed in my house numbers and started scrolling through fonts to pick out a few favorites. I narrowed it down to eight. After staring at them for about 15 minutes and texting a few friends to get their input, I picked option “e”. The font is Rockwell. I was torn between “a” and “e”, but I thought “e” would be easier to cut out and paint because of the sharper corners.
 After picking the font, I went out to the front steps to measure how tall I wanted the numbers to be. I returned to the computer and enlarged the font to the desired size.
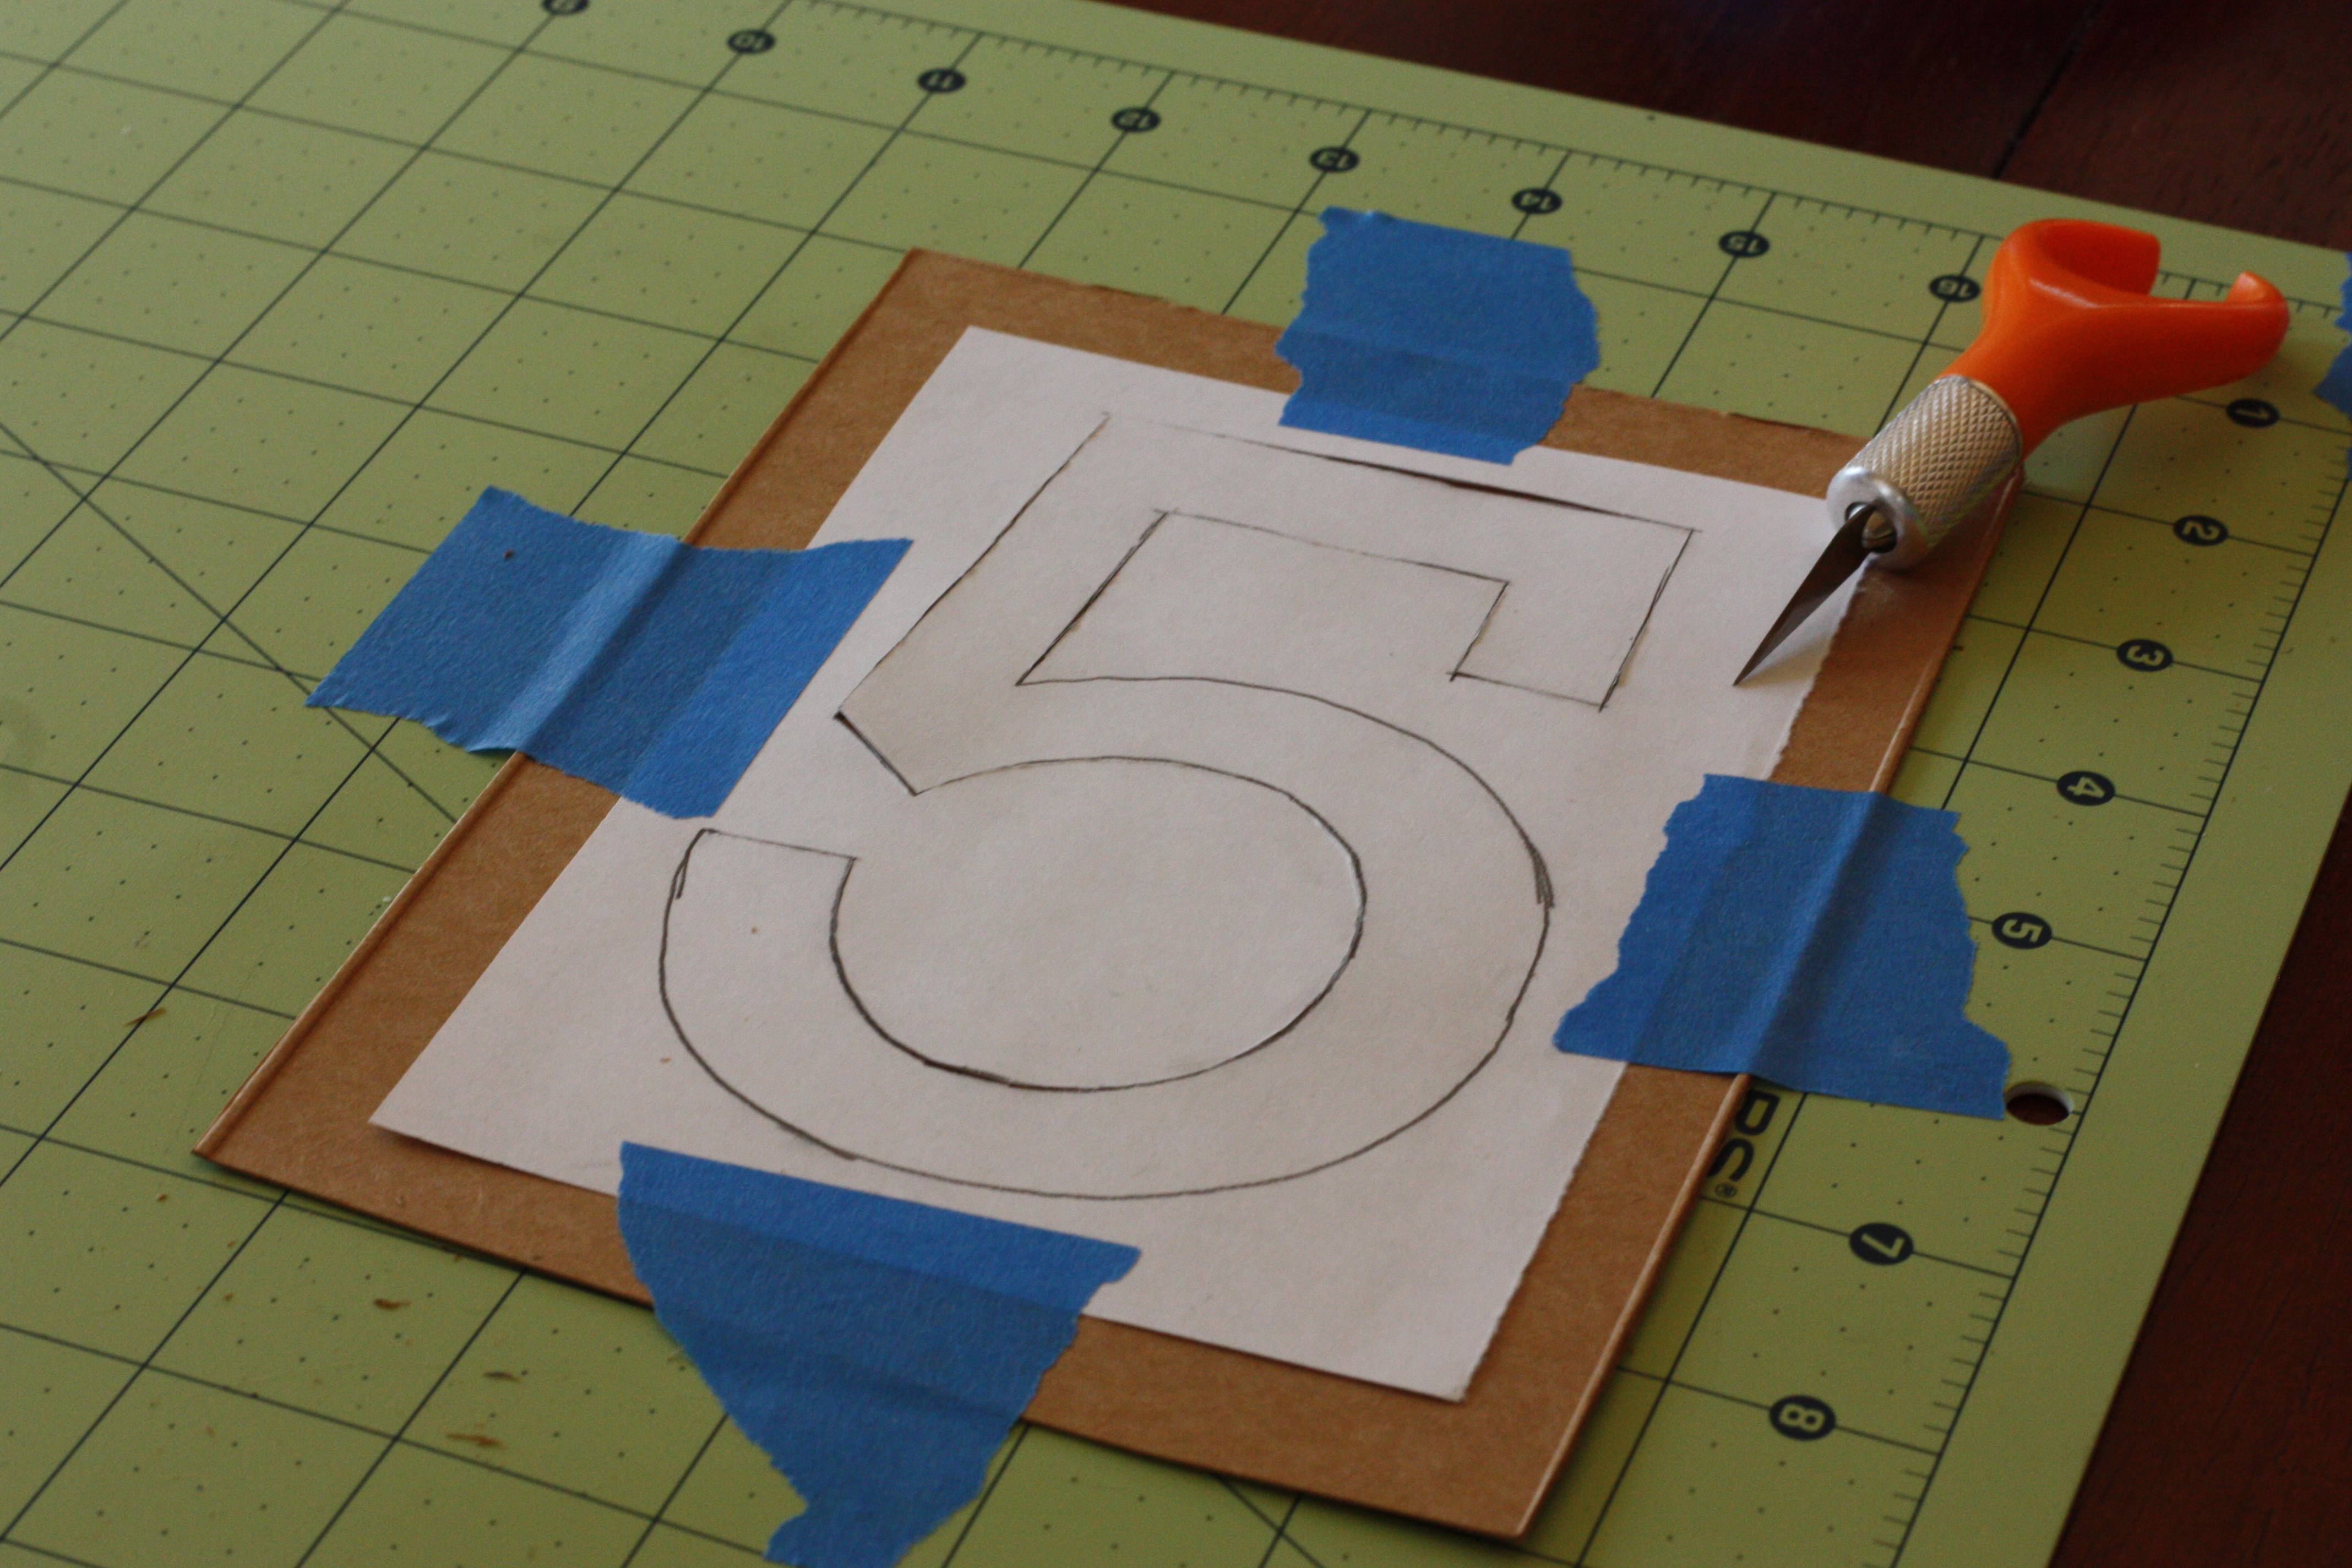
Now, a normal person would probably print out their numbers, but I wanted to save printer ink. 🙂 I cut out a piece of printer paper and carefully taped it to my laptop screen. I know, I know, I’m sure this is frowned upon. But, I will tell you I used painters tape and I stuck it/unstuck it to my shirt a few times to de-sticky it. I then carefully and lightly traced my numbers, one at a time.

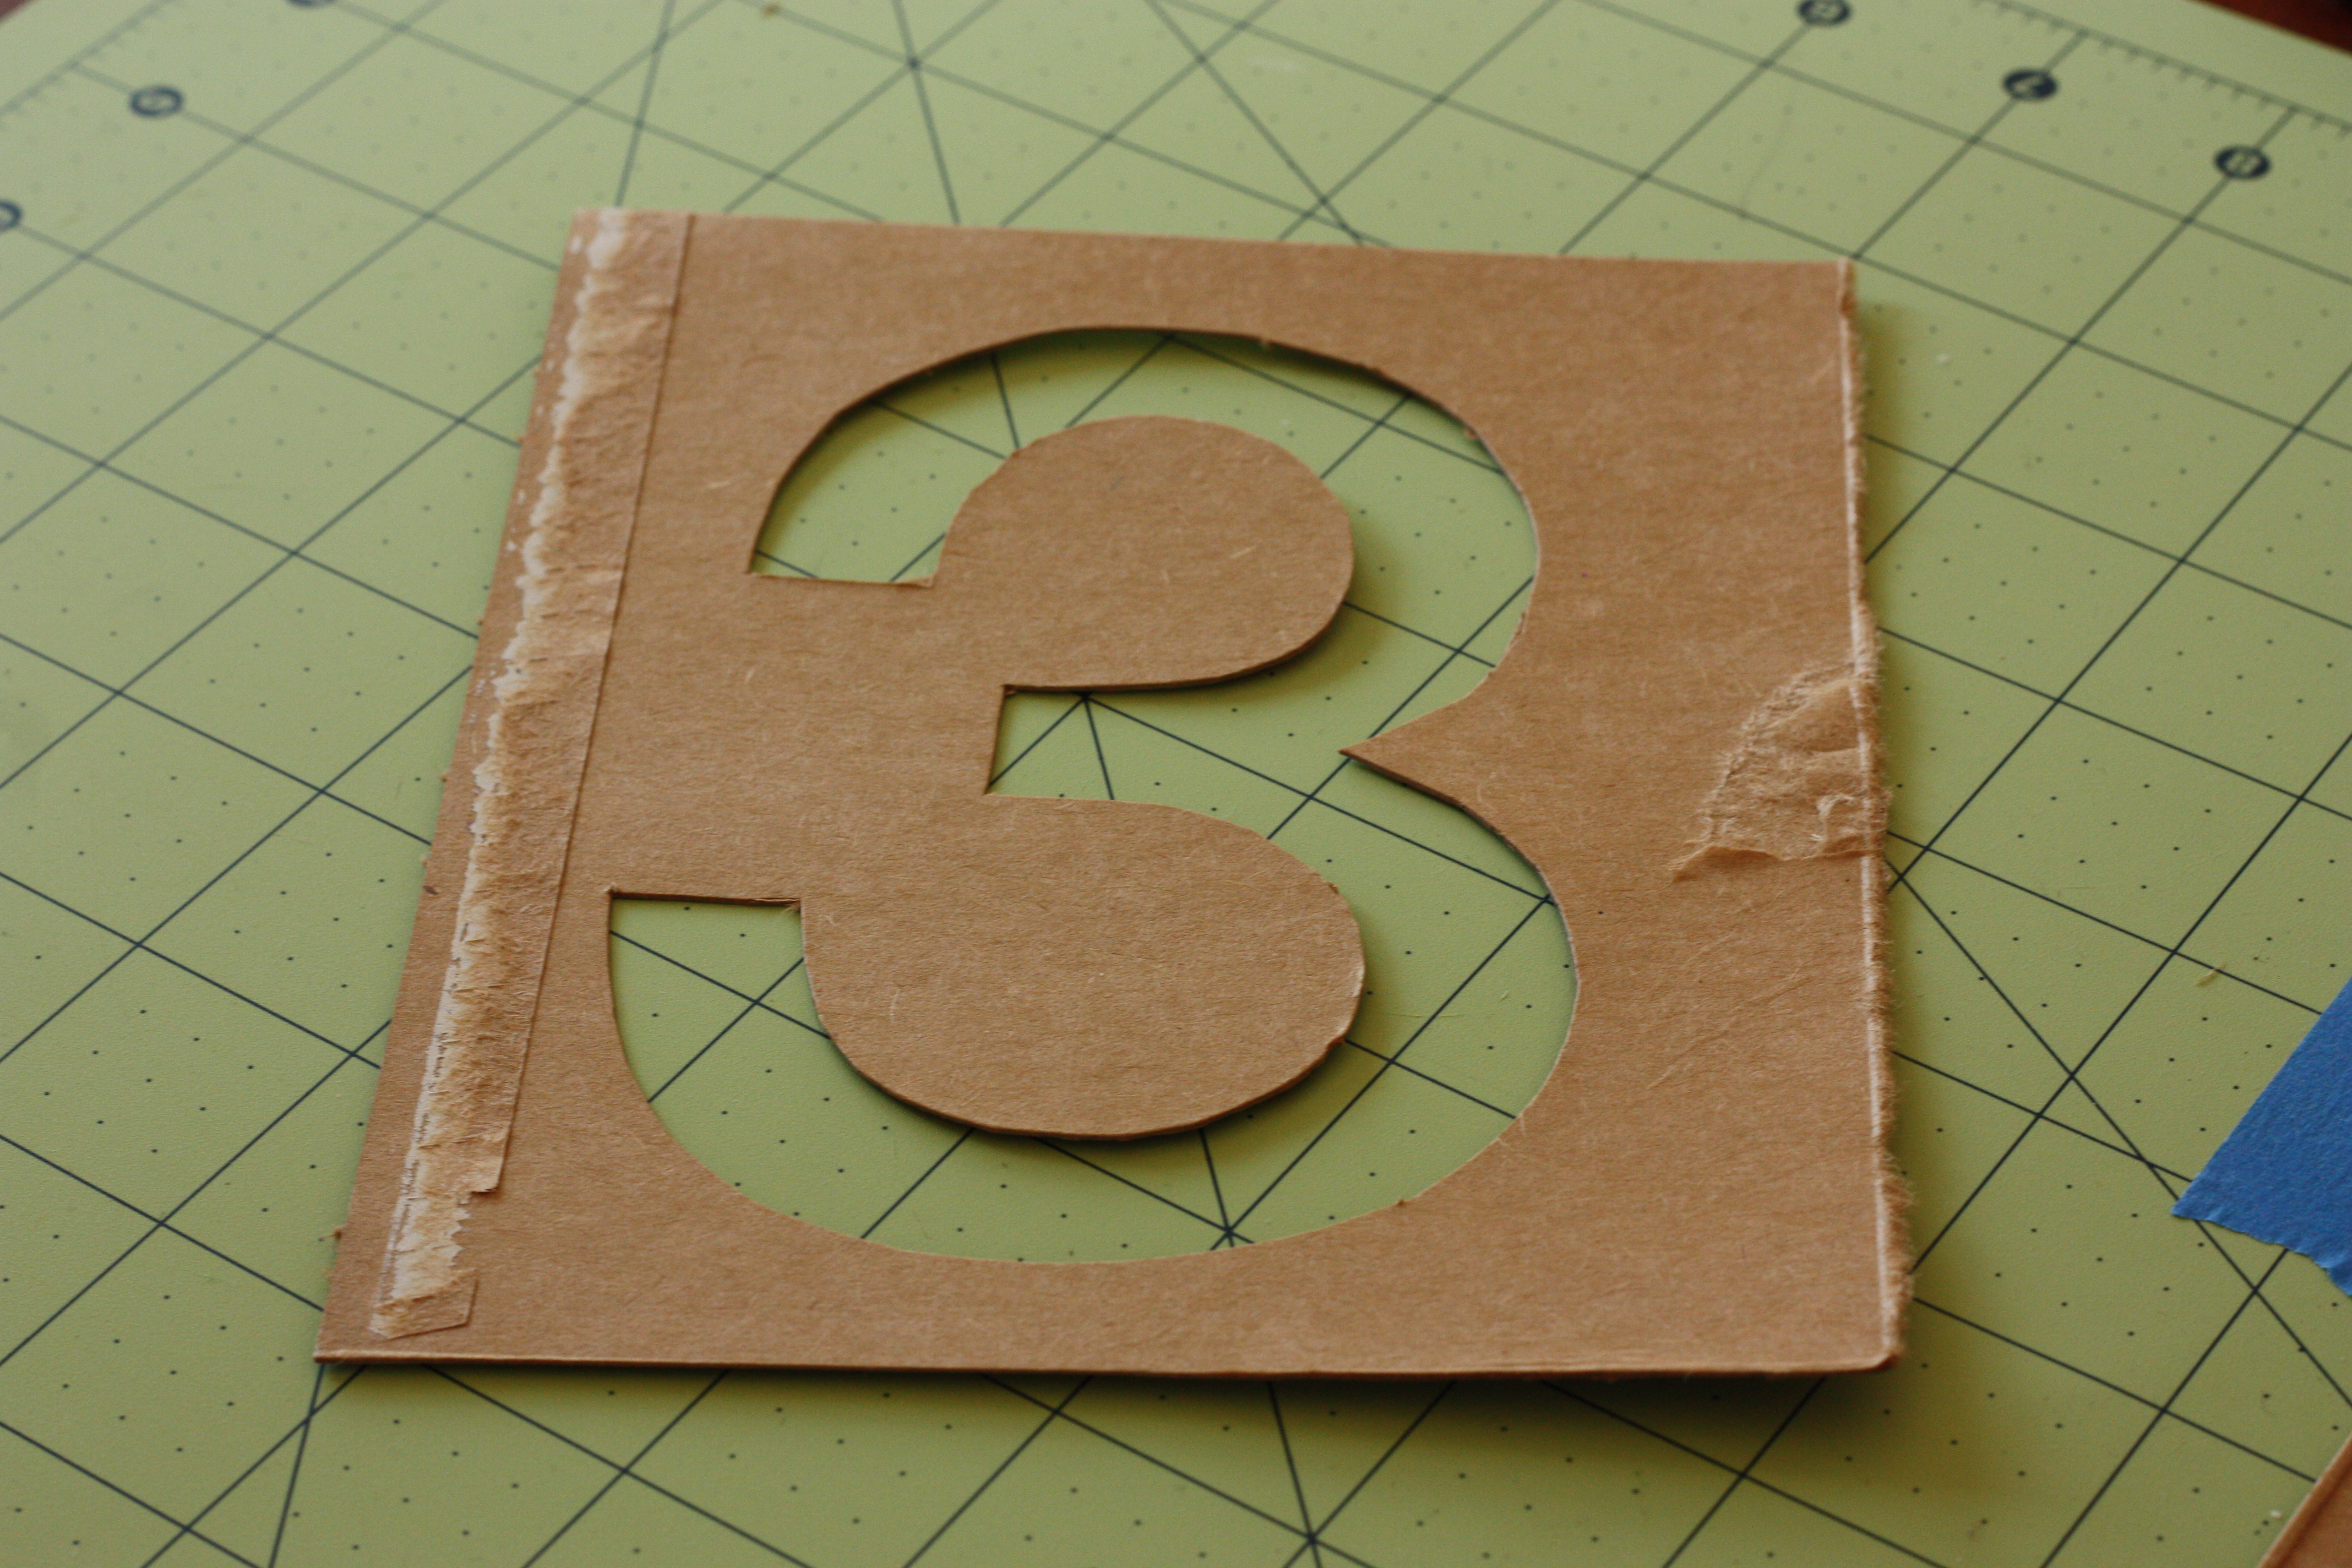
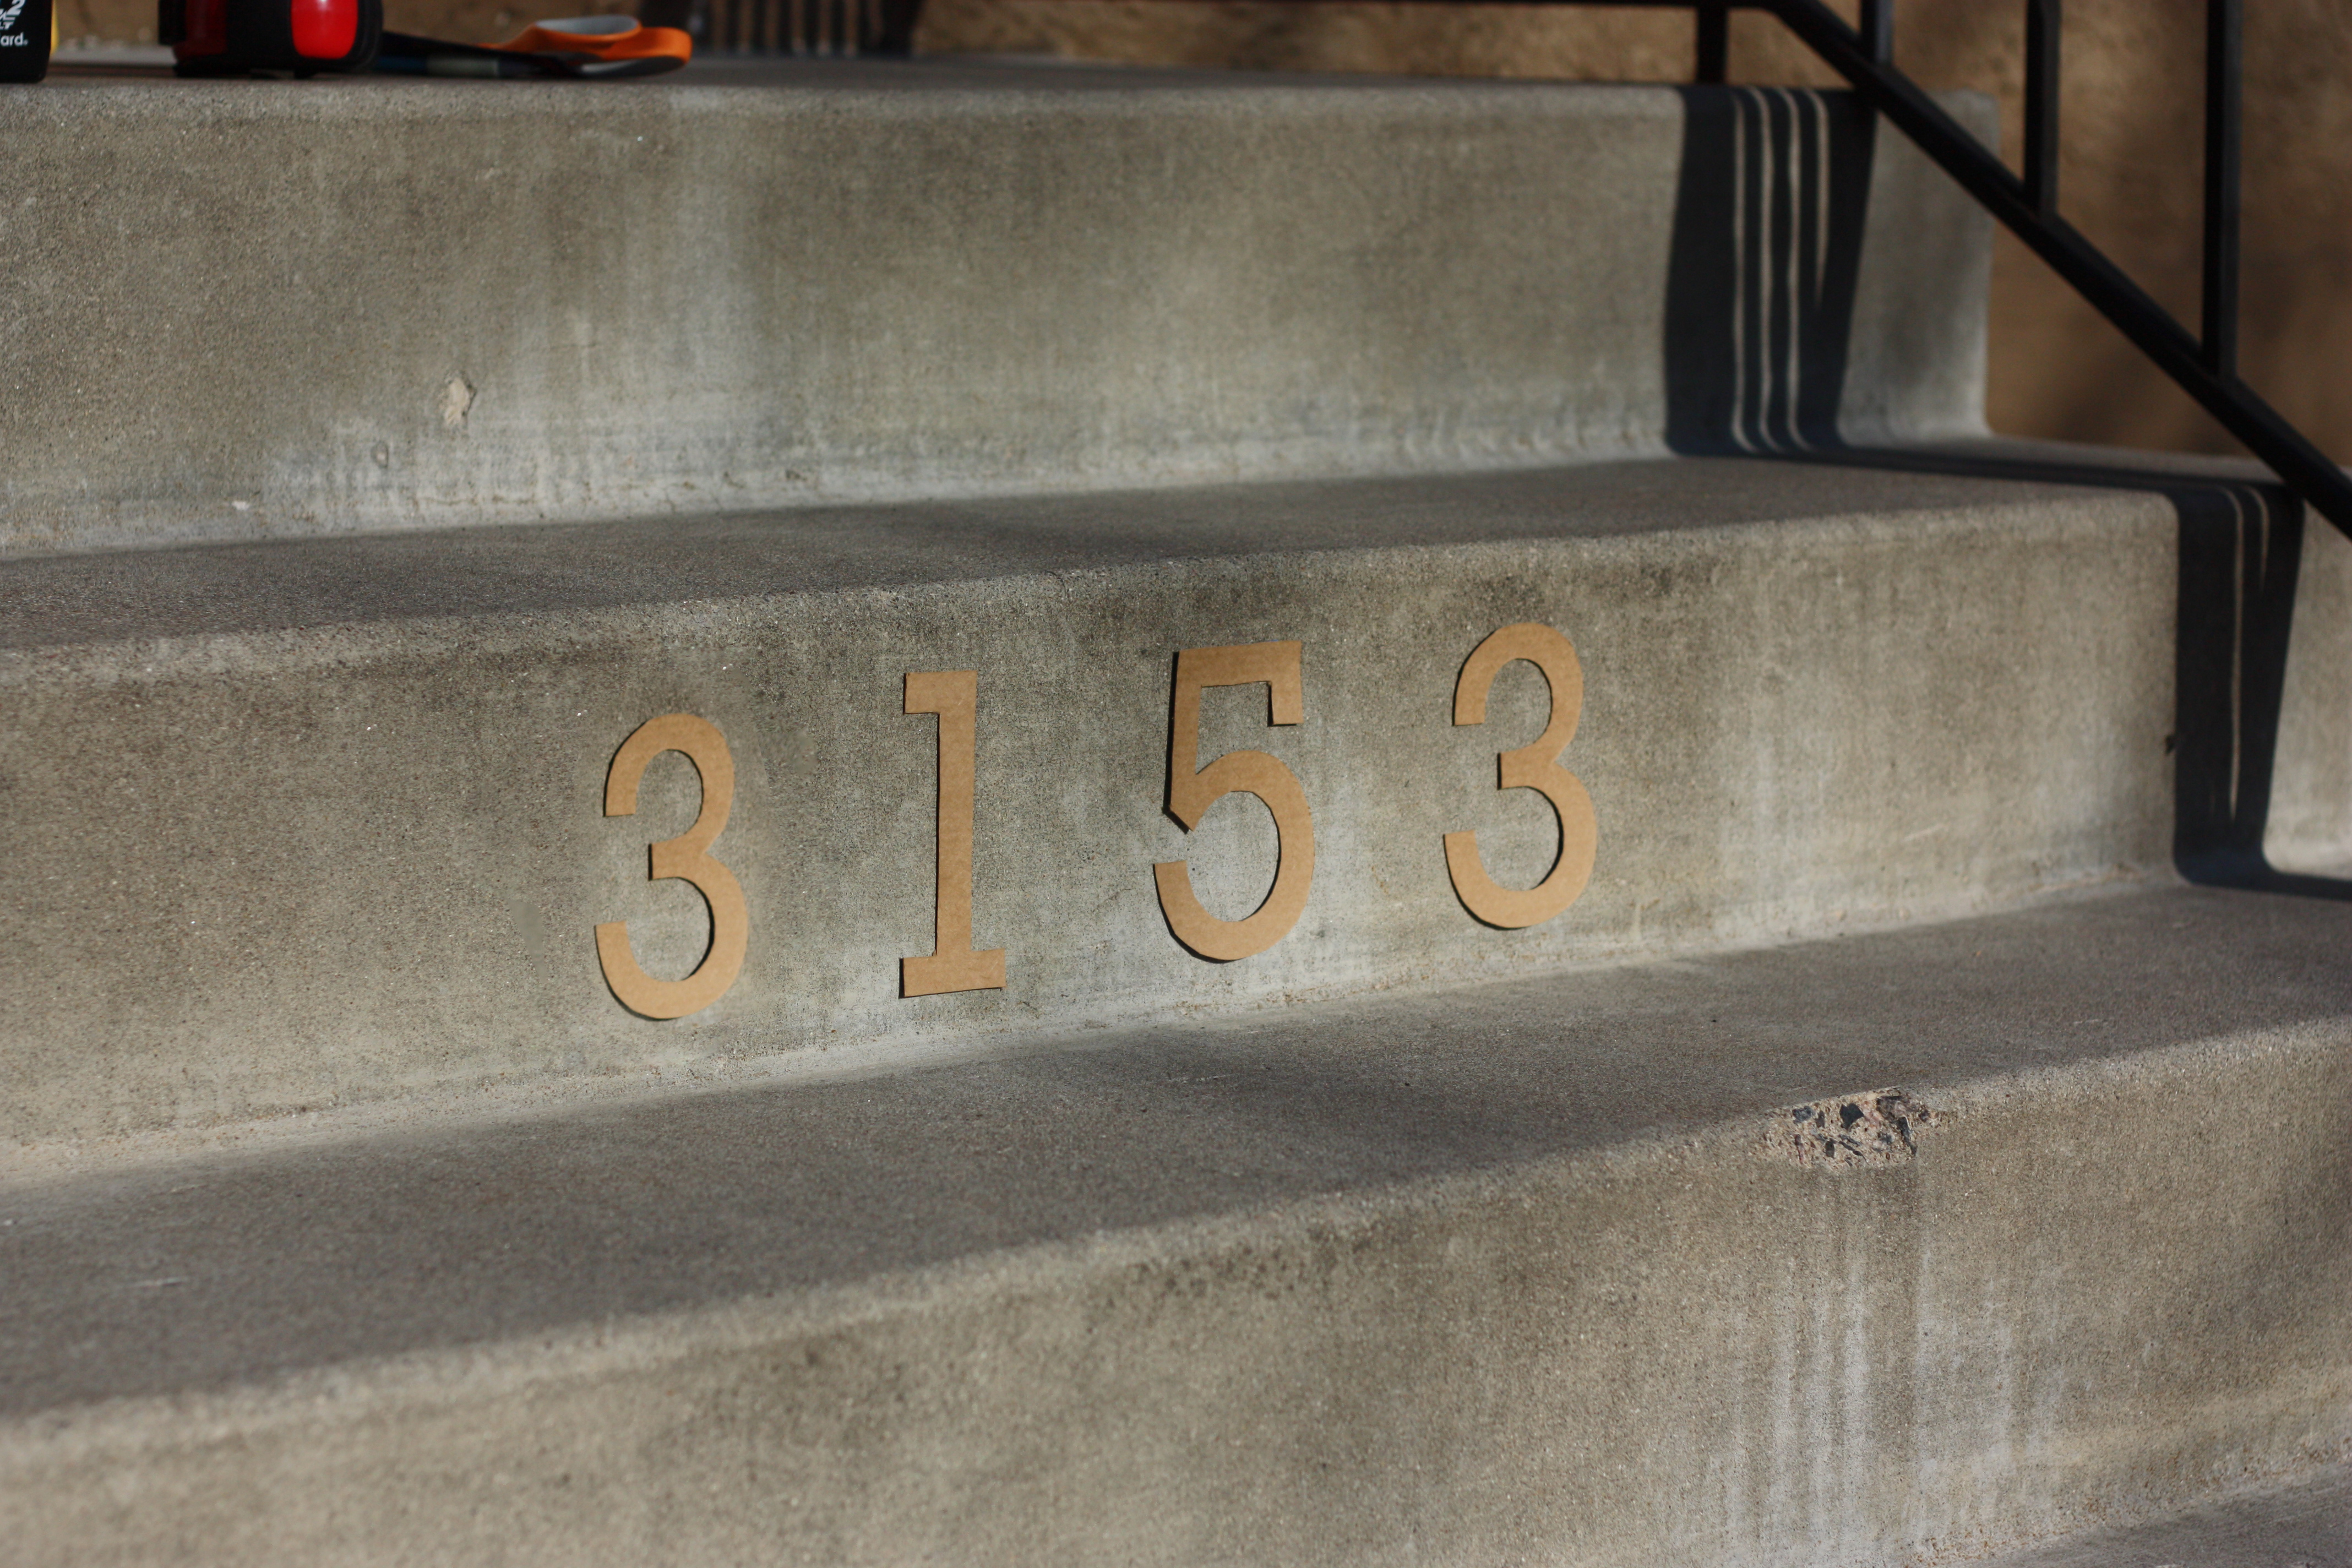
After this, I found an old cracker box in the recycling and cut it into rectangles to use as my stencil. I placed my newly traced number on top of the cardboard and then taped them both to my cutting board. I then cut the number out using my Fiskars Fingertip Craft Knife. This razor is awesome for precision cutting and so easy to hold! I repeated this for each of my numbers. Even though I have duplicate numbers in my address, I still did two “3s” to make things easier when it was time to paint.

This is awesome.
I was almost ready to paint! I headed out front with the stencils and the numbers that I had cut out. I first taped up the numbers that I had punched out of the stencils to center them on the stairs just where I wanted them.
Once centered (sorry, I didn’t take a good straight-on picture) I placed the stencils over each number and taped them loosely in place. I then used a level to make sure they were positioned as I wanted. I adjusted their positioning/tape as necessary. I then took each stencil off one at a time and sprayed with Elmer’s CraftBond Multi-Pupose Spray Adhesive. I quickly placed the stencil back on the step— guided by the punched out number still in place. I pressed down to firmly stick in place. I repeated for each number and then taped all edges to protect the stairs when painting.
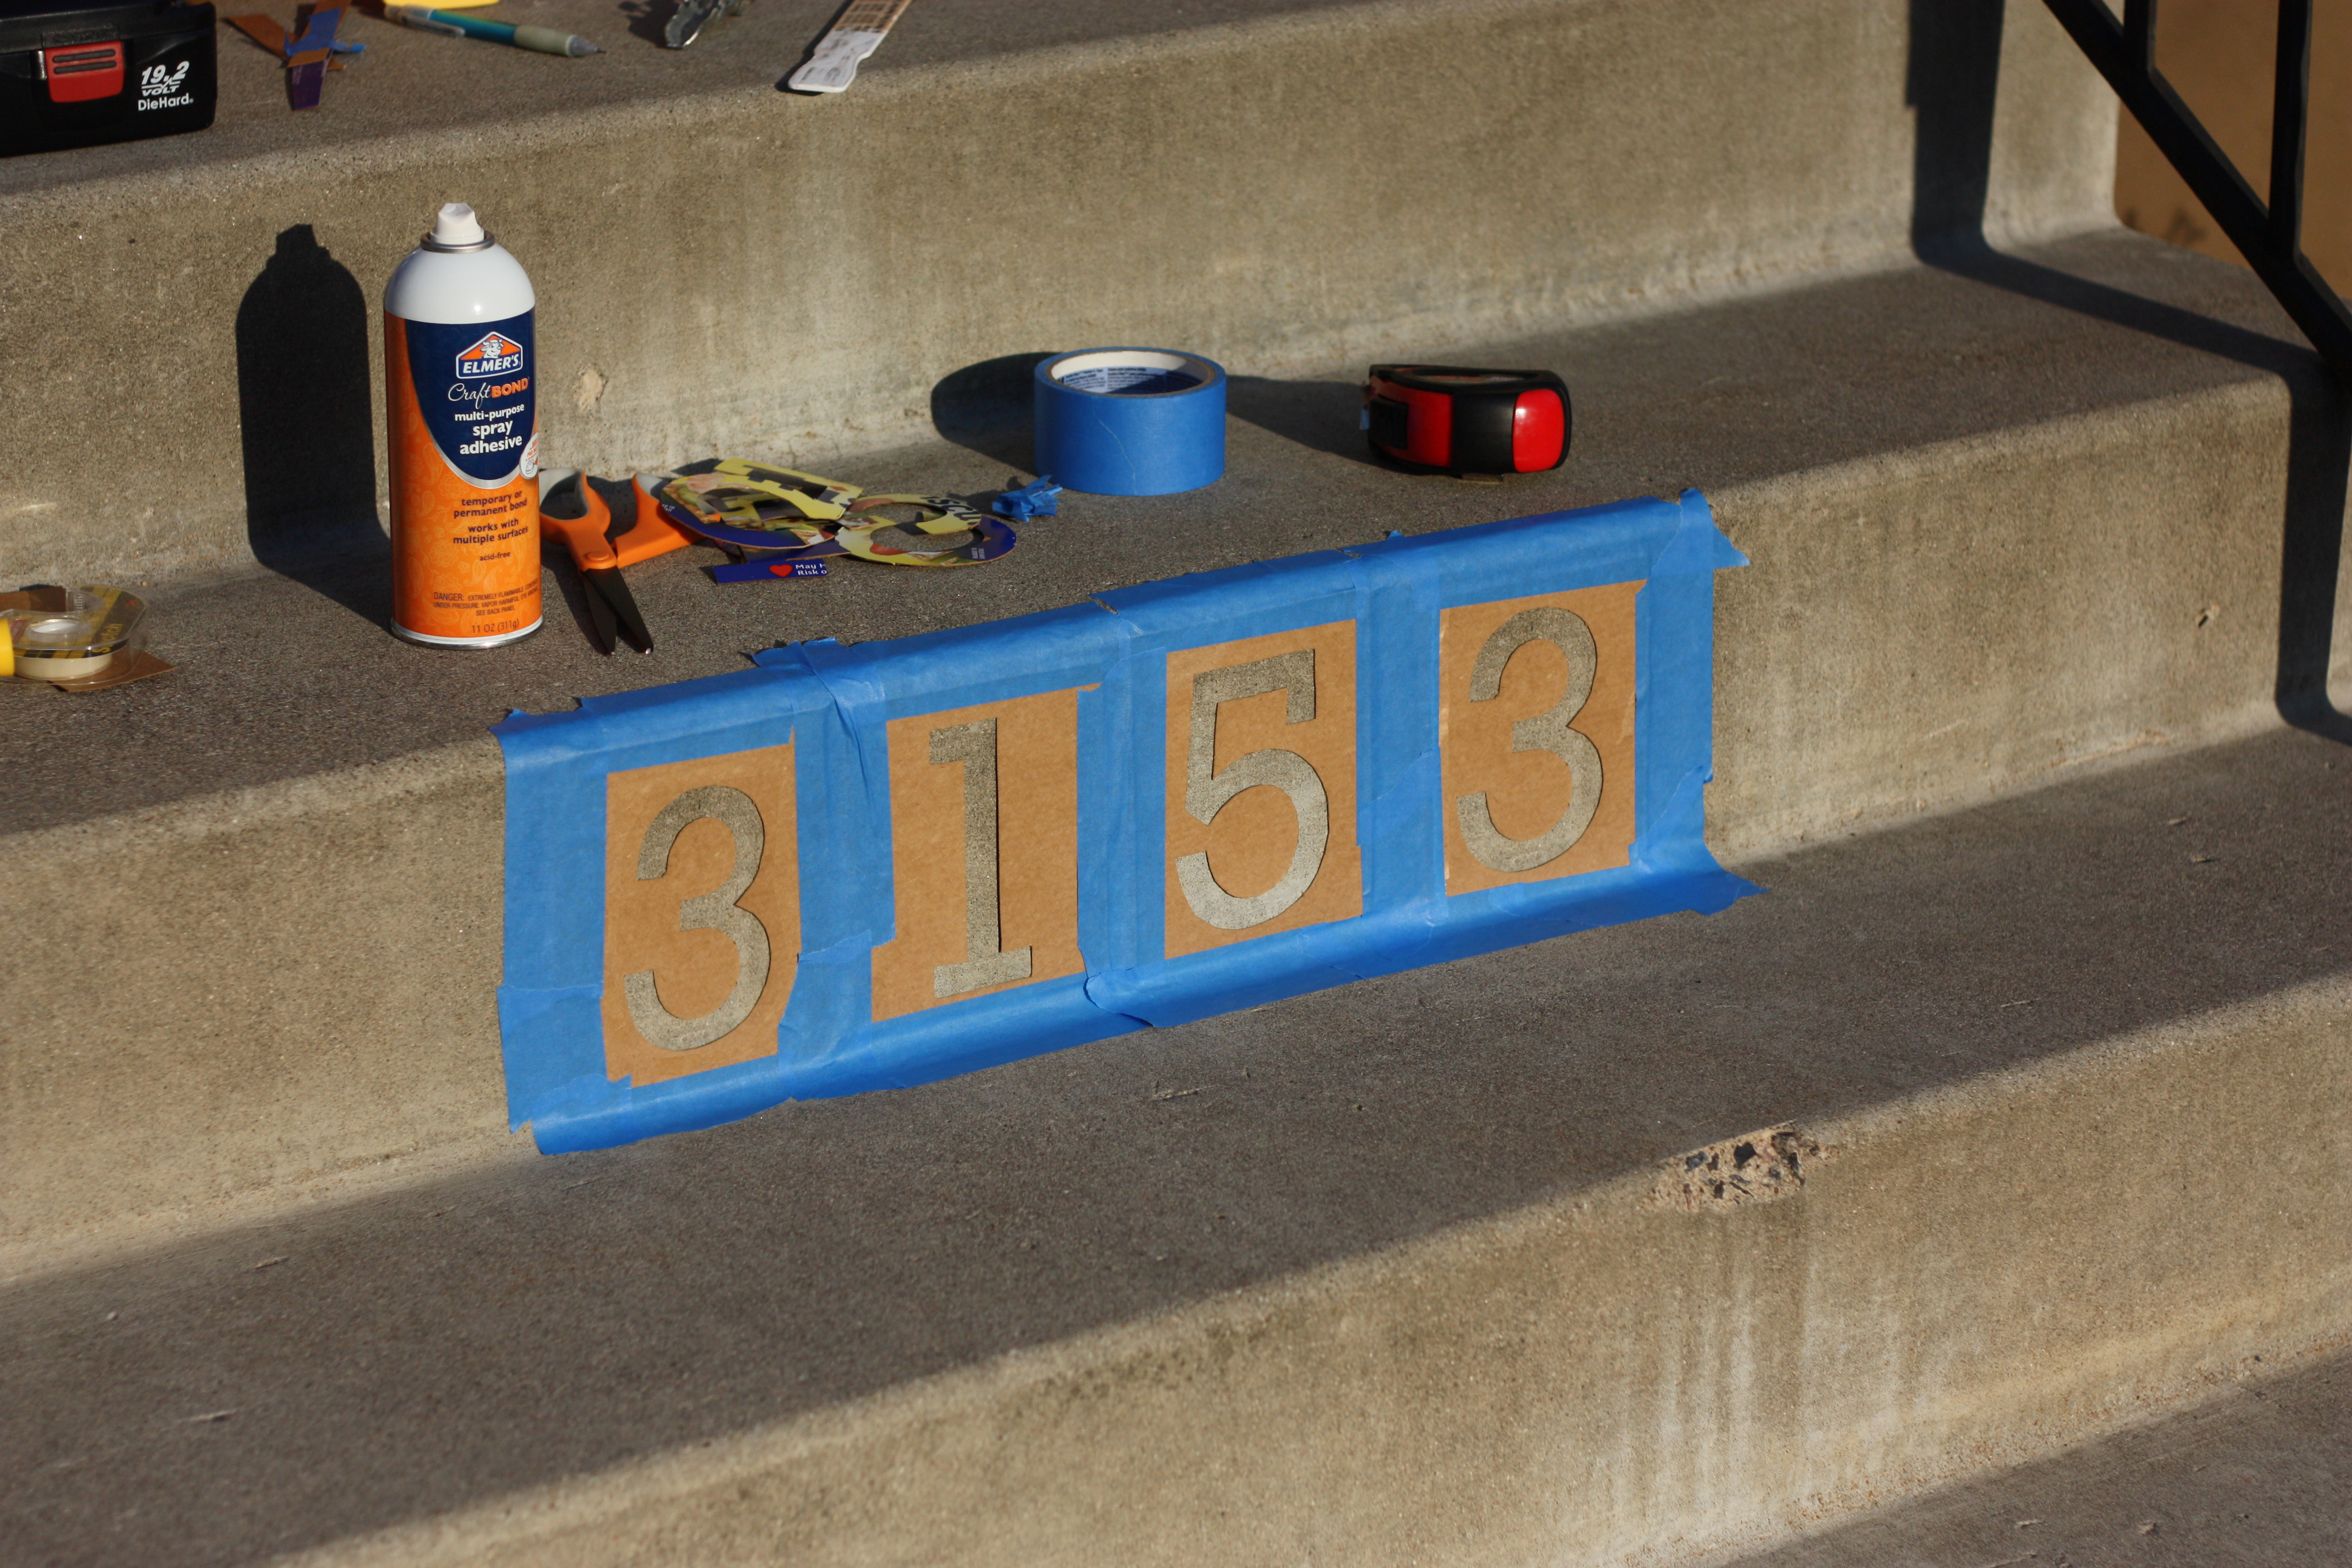
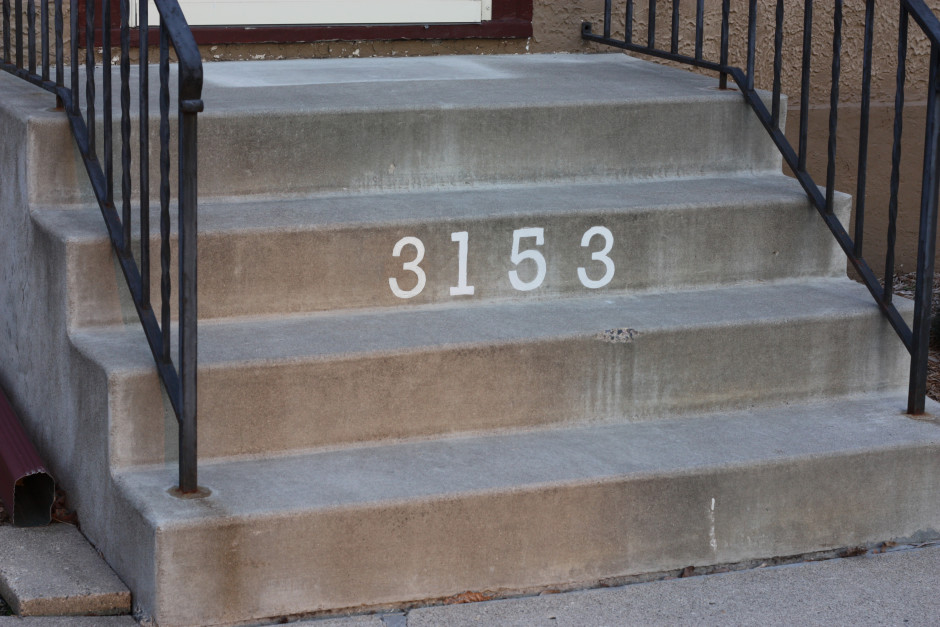
I was ready to paint! I used some leftover white concrete paint from painting the cinderblock walls in the basement a few years ago. I used a small 3″ roller to apply the paint. I made sure to use the paint sparingly as not to let it bleed underneath the stencil. It helped that I used the CraftBond, but it was not fool proof. Once I had painted each number I took the stencils off to reveal my work!

Finally! Numbers that can be seen from the street at night. (Our house numbers also used to be black and I spray painted them white too!) I used a hobby knife when I was done to scrape away a few stray paint marks that bled underneath the cardboard stencil.

Materials:
- Computer with Microsoft Word
- Paper (1 sheet for each house number)
- Scissors
- Painters tape
- Ruler or tape measure
- Cardboard
- Knife (My favorite is the Fiskars Fingertip Craft Knife)
- Cutting board
- Spray adhesive (I used Elmer’s CraftBond Multi-Pupose Spray Adhesive)
- Concrete paint
- Paint roller
- Paint tray or paper plate
- Hobby knife (I used one from my Tool Shop 13-Piece Hobby Knife Set)
Steps:
- Pick number font
- Print (or trace!) at desired size
- Place number on top of cardboard and cut out stencil
- Punch out numbers (make sure to cut them whole to use in the next step)
- Place numbers on the steps to determine desired location
- Use spray adhesive on the back of each stencil and stick them on the stairs using your taped on numbers as a guide
- Remove punched out numbers from inside the stencil
- Tape stencils in place to protect steps when painting
- Paint
- Remove stencils
- Touch up any bleeding with hobby knife
No Comments